

Creating content for social media can be incredibly time-consuming. In this post, I’ll walk you through how to build an AI-powered social media agent that automates up to 80% of your content creation and publication process. By the end, you’ll be able to manage your social accounts more efficiently, all controlled through WhatsApp.
I created an automation that serves as an AI agent for managing social media. This agent can handle a variety of tasks, from conducting research to crafting posts tailored to different platforms. It streamlines the process, allowing users to save time while maintaining a consistent brand voice.
By leveraging advanced AI models, the agent generates content that resonates with the target audience. Whether it’s a witty tweet or an engaging Instagram caption, this AI agent adapts to the nuances of each platform. Additionally, it has the capability to fetch relevant images, whether from stock libraries or through AI generation.

Key Features of the AI Agent
- Research: The agent can perform deep research on trending topics, ensuring your content is timely and relevant.
- Content Creation: It drafts posts in your brand’s tone of voice, tailored for various social media platforms.
- Image Generation: The agent can create AI images or source stock photos to accompany your content.
- Multi-Platform Publishing: Posts can be published directly to Facebook, Twitter, Instagram, and LinkedIn.
- Control via WhatsApp: Users can interact with the agent through voice notes, text messages, or image uploads on WhatsApp.

Voice Note Demo
One of the standout features of this AI agent is its ability to process voice notes. This makes it incredibly convenient for users who prefer speaking over typing. For instance, I can send a quick voice note asking the agent to research the latest trends in the generative AI space.
Upon receiving the voice note, the agent activates the workflow. It uses OpenAI’s chat model to interpret the request, performing a Google search for relevant information. This process is seamless and can be monitored through WhatsApp, where I receive updates in real time.

Example of Interaction
After sending a voice note, the agent processes the request and provides me with a summary of the latest trends. Additionally, it drafts several social media posts with different angles and hooks.
This interaction showcases the agent’s ability to generate content quickly while allowing for further refinement. If I want more details on a specific trend, I can easily ask the agent to dig deeper.
Understanding the Workflow
The workflow of the AI agent is designed to be intuitive. It begins with a trigger from WhatsApp, where the user initiates a request. This request is then processed through a series of automated steps that involve various AI tools.
First, the agent interprets the user’s input, whether it comes from a voice note or text. It accesses the necessary tools to conduct research, generate content, or fetch images. The results are then sent back to the user for review.

The Role of N8N and Make.com
N8N and Make.com are the backbone of this automation. N8N handles the workflow management, allowing the agent to connect with different services and tools, while Make.com facilitates the publishing process across social media platforms.
This integration allows the agent to function efficiently, ensuring that each step of the process is executed smoothly. The combination of these no-code platforms makes it accessible for anyone, regardless of technical expertise.

Setting Up the N8N Agent
Setting up the N8N agent is straightforward. I start by creating a new workflow within N8N. The first step is to add a trigger, which can be set to respond to messages from WhatsApp or any other chat interface.
Next, I incorporate an AI agent that can process the incoming messages. This agent is configured to utilize OpenAI’s language model, allowing it to understand and respond to user queries effectively.

Configuring the Agent
Once the trigger is in place, I define the agent’s capabilities. This includes setting a system message that instructs the agent on its role, such as being a social media assistant. I also provide guidelines on the tone of voice and specific tasks it should prioritize.
Adding memory functionality is crucial for tracking ongoing conversations. This allows the agent to remember previous interactions and context, making follow-up queries more coherent.

Utilizing Google Search Tool
To gather relevant information, I set up a Google search tool within the N8N workflow. This tool allows the agent to fetch the latest news and trends based on user-defined keywords.
For effective searches, I use Data for SEO as the API provider. This platform offers comprehensive datasets that enhance the agent’s ability to retrieve accurate information quickly.

Dynamic Search Capabilities
One of the features I implemented is the ability to perform both organic and news searches. By using placeholders, I can instruct the agent to switch between different types of searches based on user requests.
This flexibility ensures that the agent can provide the most relevant results, whether the user is looking for trending news articles or general information about a topic.

Fetching Webpage Markdown
To extract detailed information from web pages, I integrated a tool that fetches webpage markdown using the Jina AI server. This tool simplifies the process of retrieving rich text content without unnecessary HTML clutter.
When the agent identifies a relevant article, it can make a request to the Jina AI server, which processes the URL and returns the content in a format suitable for AI models.
Enhancing Content Quality
This capability significantly enhances the quality of the content generated. By sourcing detailed information from credible articles, the agent ensures that the posts are not only engaging but also informative.
This feature is particularly useful for creating in-depth social media posts that require more than just surface-level information.
Pixabay & AI Images
To make my social media posts visually appealing, I integrated Pixabay for sourcing high-quality stock images. Pixabay offers a vast library of images that are free to use, which is perfect for enhancing my content without worrying about copyright issues.
Whenever I create a post, the agent can automatically fetch relevant images based on the content. For instance, if I draft a post about a tech trend, the agent searches Pixabay for images that match the theme. This not only saves time but also ensures that the visuals align well with the message.

Generative AI Images
In addition to stock images, I also implemented a feature for generating unique visuals using AI. This allows the agent to create custom images tailored specifically to my content needs. For example, if I want an image that represents a futuristic concept, the AI can generate a graphic that fits perfectly.
This capability adds a personal touch to my posts, making them stand out in the crowded social media landscape. By combining stock images from Pixabay with AI-generated visuals, I have a diverse range of options for every post.

Requesting Social Posts with Safeguard
When it comes to requesting social media posts, I implemented a safeguard feature to ensure quality and relevance. This safeguard acts as a filter, allowing me to set specific parameters for the content I want the agent to create.
For example, I can specify the tone, length, and key points to cover in the post. This prevents the agent from generating content that might not align with my brand voice or messaging strategy. The safeguard gives me peace of mind, knowing that the output will meet my expectations.

Examples of Requests
When I make a request, I can phrase it in various ways. If I want a promotional post for an upcoming event, I simply tell the agent the details, like the date and key features of the event. The safeguard checks these inputs against my predefined parameters.
The agent then drafts a post that adheres to my guidelines, ensuring it’s both engaging and informative. This process streamlines content creation while maintaining a consistent brand message across all platforms.

Approving Social Posts
Once the agent generates social media posts, the next step is approval. I review the drafts within the WhatsApp interface, where I can easily see the content the agent has created. This review process is crucial, as it allows me to make any necessary adjustments before publishing.
If a post needs changes, I can provide feedback directly through WhatsApp. The agent is programmed to understand my suggestions and can revise the post accordingly. This back-and-forth interaction ensures that the final output meets my standards.

Streamlining the Approval Workflow
The approval workflow is designed to be efficient. After I review a post, I can either approve it or request modifications. If approved, the agent prepares the post for publishing, making the entire process seamless.
This system not only saves time but also enhances the quality of the content shared on my social media accounts. I can focus on strategy while the agent handles the nitty-gritty of post creation and approval.

Publishing Demo
Publishing content is the final step in the workflow. Once a social media post is approved, the agent can publish it directly to the selected platforms. I’ve set up the agent to handle multiple accounts simultaneously, which is a major time-saver.
The publishing process is straightforward. I simply select the platforms where I want the post to appear, and the agent takes care of the rest. This includes formatting the content appropriately for each platform to ensure it looks great, whether it’s on Instagram, Twitter, or LinkedIn.

Scheduling Posts
Beyond immediate publishing, I can also schedule posts for later. This feature is incredibly helpful for planning my content calendar. I can decide the best times to post based on when my audience is most active.
The agent manages the scheduling, ensuring that posts go live at the designated times. This feature helps maintain a consistent posting schedule without requiring constant oversight.

WhatsApp Setup
Setting up WhatsApp as the main interface for interacting with the AI agent was a key step in the process. I configured the agent to receive and send messages through WhatsApp, allowing for a conversational approach to content management.
This setup makes it easy to communicate with the agent on the go. I can send requests or approve posts directly from my phone, making the entire system accessible and user-friendly.

Integration with Other Tools
Beyond just WhatsApp, I integrated other tools to enhance functionality. For example, I connected the agent to my calendar app to automatically fetch important dates for content creation. This ensures I’m always aware of upcoming events that could benefit from social media promotion.
The integration creates a cohesive ecosystem where the agent can pull information from various sources, making my workflow even more efficient.

Exploring the Architecture
Understanding the architecture behind the AI agent is crucial for optimizing its performance. I built the system using a combination of N8N and Make.com, which together form a powerful automation backbone.
The architecture consists of various nodes that handle different tasks, from processing requests to publishing content. Each node is designed to perform a specific function, ensuring that the workflow remains organized and efficient.

Node Functions
Each node in the architecture plays a vital role. For instance, one node is responsible for interpreting user requests, while another fetches images or generates content. This separation of functions allows for easier troubleshooting and optimization.
By monitoring the performance of each node, I can identify areas for improvement and make adjustments as needed. This level of control is essential for maintaining the agent’s effectiveness over time.

Human-in-the-Loop Feature Explained
The human-in-the-loop feature is essential for ensuring the AI agent operates effectively without overwhelming social media audiences. I built this safeguard based on extensive testing, which showed that AI agents can sometimes generate excessive or irrelevant content. To avoid spamming followers with repetitive posts, I’ve divided the publishing process into two distinct stages.
First, the AI agent can only request content publication. It doesn’t publish posts directly. This first step sends a request through Make.com, which then triggers a WhatsApp message containing a unique approval link. Clicking this link initiates another scenario in Make.com, which handles the actual publication of the content on social media.

Safeguards in Place
This two-step process ensures the AI agent cannot inadvertently publish content. It doesn’t have visibility into the approval workflow, making it impossible for it to trigger posts without human consent. This design keeps the publication process secure and under control.
Within the approval scenario, the workflow uses routers to determine the appropriate social media platform for the post. Each platform has its specific requirements, which the system handles automatically. This way, I can ensure that content is published only when it’s appropriate and aligns with my overall social media strategy.

Detailed Workflow Overview
The workflow for the AI agent is structured to facilitate seamless communication and content management. It begins with a trigger from WhatsApp, where I send a request for content creation. The agent interprets this input and proceeds through a series of automated steps to generate the desired output.
Initially, the agent receives the request and determines the necessary actions. It utilizes various AI tools to conduct research, generate content, or fetch relevant images. After processing, the results are compiled and sent back to me for review.
Integrating N8N and Make.com
N8N serves as the primary workflow manager, connecting the AI agent with various services and tools. Make.com is responsible for executing the actual publication process across different social media platforms. This integration allows for a smooth transition between content creation and publication, ensuring each step in the process is executed efficiently.
The combination of these no-code platforms makes it easy for anyone to set up and manage their social media automation without needing extensive technical knowledge.
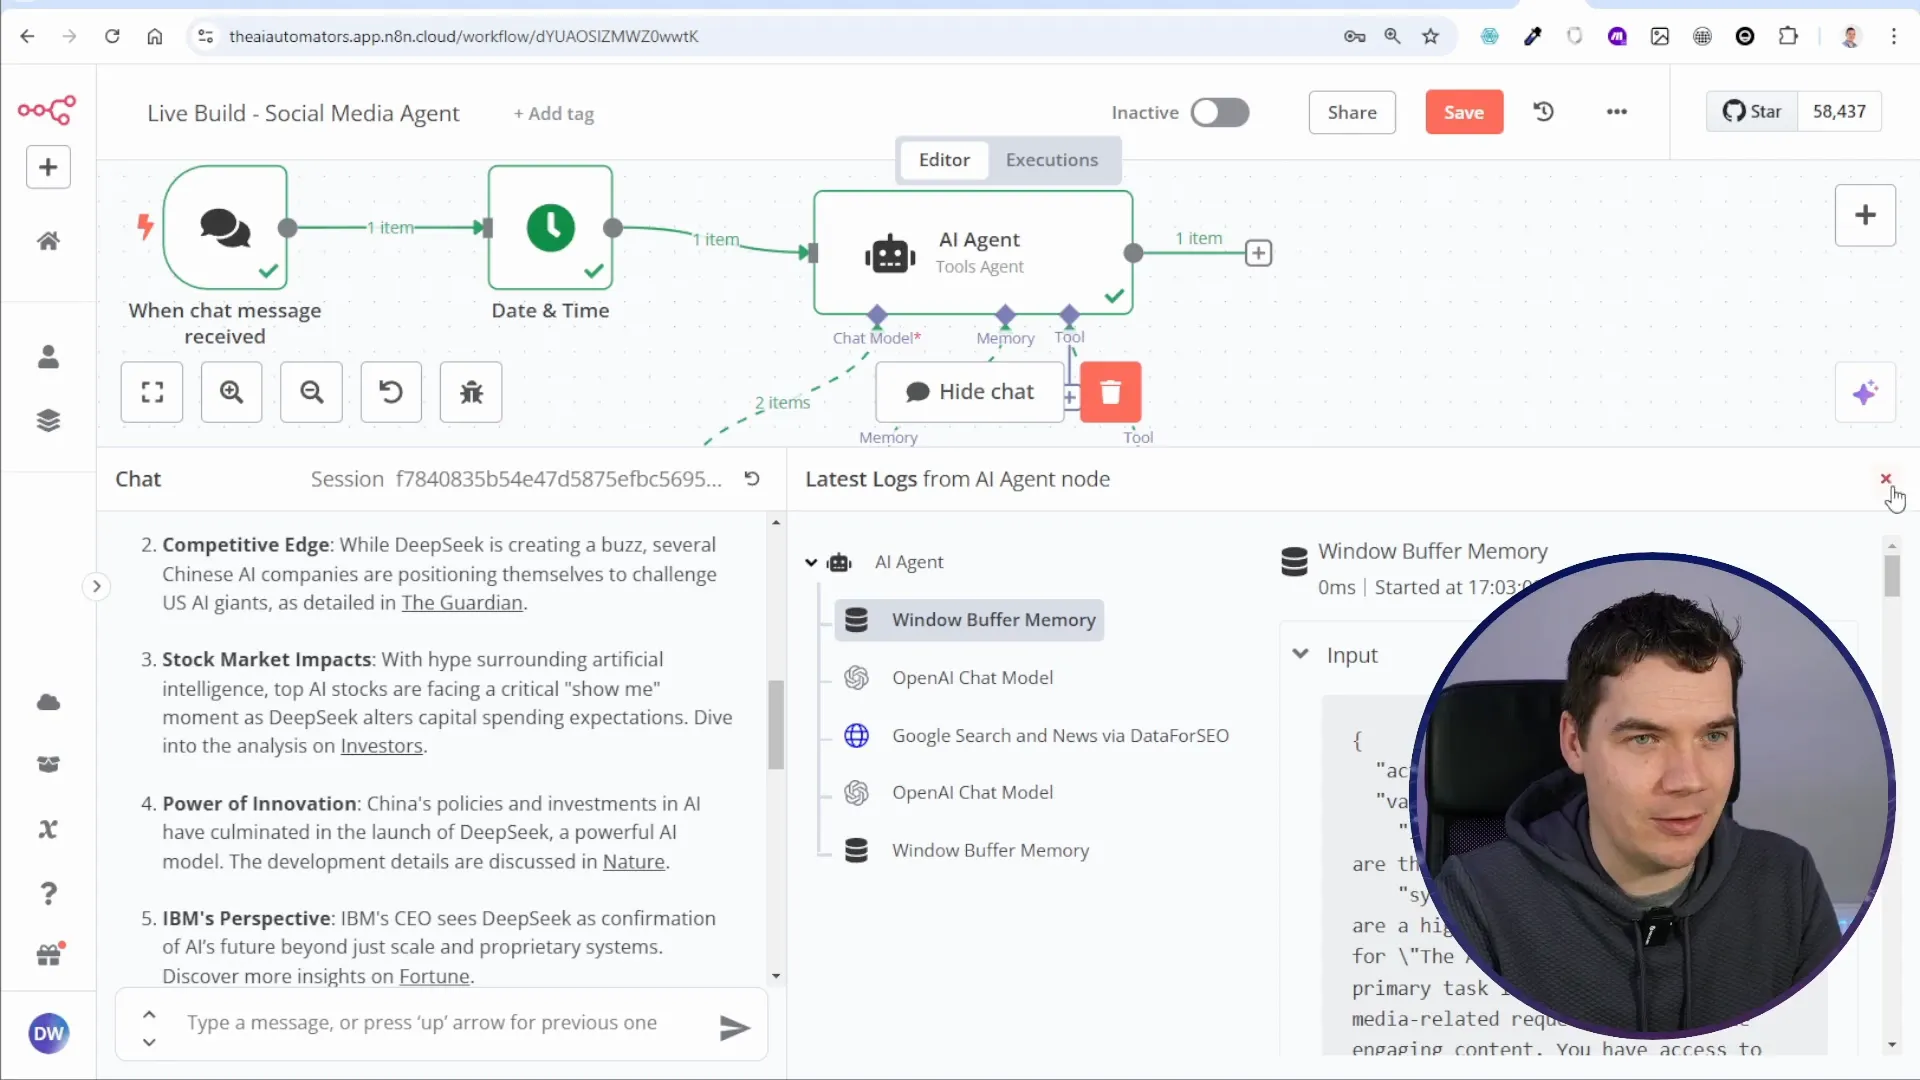
Live Build of the Social Media Agent
Building the social media agent live is an exciting part of the process. I start by creating a new workflow in N8N, beginning with the essential chat trigger. This trigger allows the agent to respond to messages, enabling a conversational interface for user interaction.
Next, I add an AI agent to the workflow. This agent is designed to trigger the appropriate tools based on user requests. I configure the source of the agent to be the chat trigger, ensuring it can respond to incoming messages effectively.
Setting Up the AI Agent
Once the trigger is in place, I configure the agent’s capabilities, including memory and the specific AI model to use. I opt for the GPT-4 model for its advanced capabilities in understanding and generating human-like text.
In this setup, I also define the agent’s system message, guiding it on its role as a social media assistant. This message includes tone-of-voice guidelines and instructions on how to handle user requests efficiently.
Testing the Agent with Real Requests
After setting up the agent, I proceed to test its functionality. I send various requests to the agent via WhatsApp, asking it to generate content on specific topics. The agent processes these requests and returns drafts of social media posts, showcasing its ability to create tailored content quickly.
During testing, I evaluate the quality and relevance of the generated posts. If adjustments are needed, I provide feedback directly through WhatsApp, allowing the agent to refine its outputs based on my suggestions.
Real-World Scenarios
For instance, when I request a post about the latest trends in AI, the agent conducts research, drafts several posts, and presents them for review. This real-time interaction highlights the agent’s capability to adapt its responses based on user feedback while ensuring the content aligns with my brand’s voice.
This iterative process not only enhances the quality of the generated content but also ensures that I remain actively involved in the content creation process, maintaining control over what gets published.
