

Last Thursday, Make.com announced it would remove its Twitter/X integration due to new API pricing changes, leaving many users scrambling for alternatives. In this blog, I’ll walk you through three effective methods to keep your X scenarios operational even after the hard deadline of May 30th.
The Announcement and Its Impact
Make.com announced the removal of its X app integration due to API policy changes and pricing. This decision impacts many users who rely on X modules in their active scenarios. By May 30th, any scenario using these modules will start throwing errors, leading to failure and deactivation.
This shift has left users scrambling for alternatives. Make.com suggested looking into other social media applications like Buffer and Hootsuite. However, I found it surprising that users were not directed toward the native HTTP modules in Make, which can connect directly to the X API. This blog will explore how to set up Buffer as a replacement for the X modules, as well as dive into a direct X API integration for those needing more specific functionalities.

Option 1: Buffer Integration
Buffer is a user-friendly option for managing social media posts. It offers a free plan that allows access to three channels, making it a cost-effective solution compared to Hootsuite. Setting up Buffer is straightforward: create an account, connect to your Twitter account, and authorize the app.
Once you’re in the dashboard, you can easily create posts. For example, you can quickly share a simple text post or even an image. The process is seamless, and Buffer’s interface is intuitive.
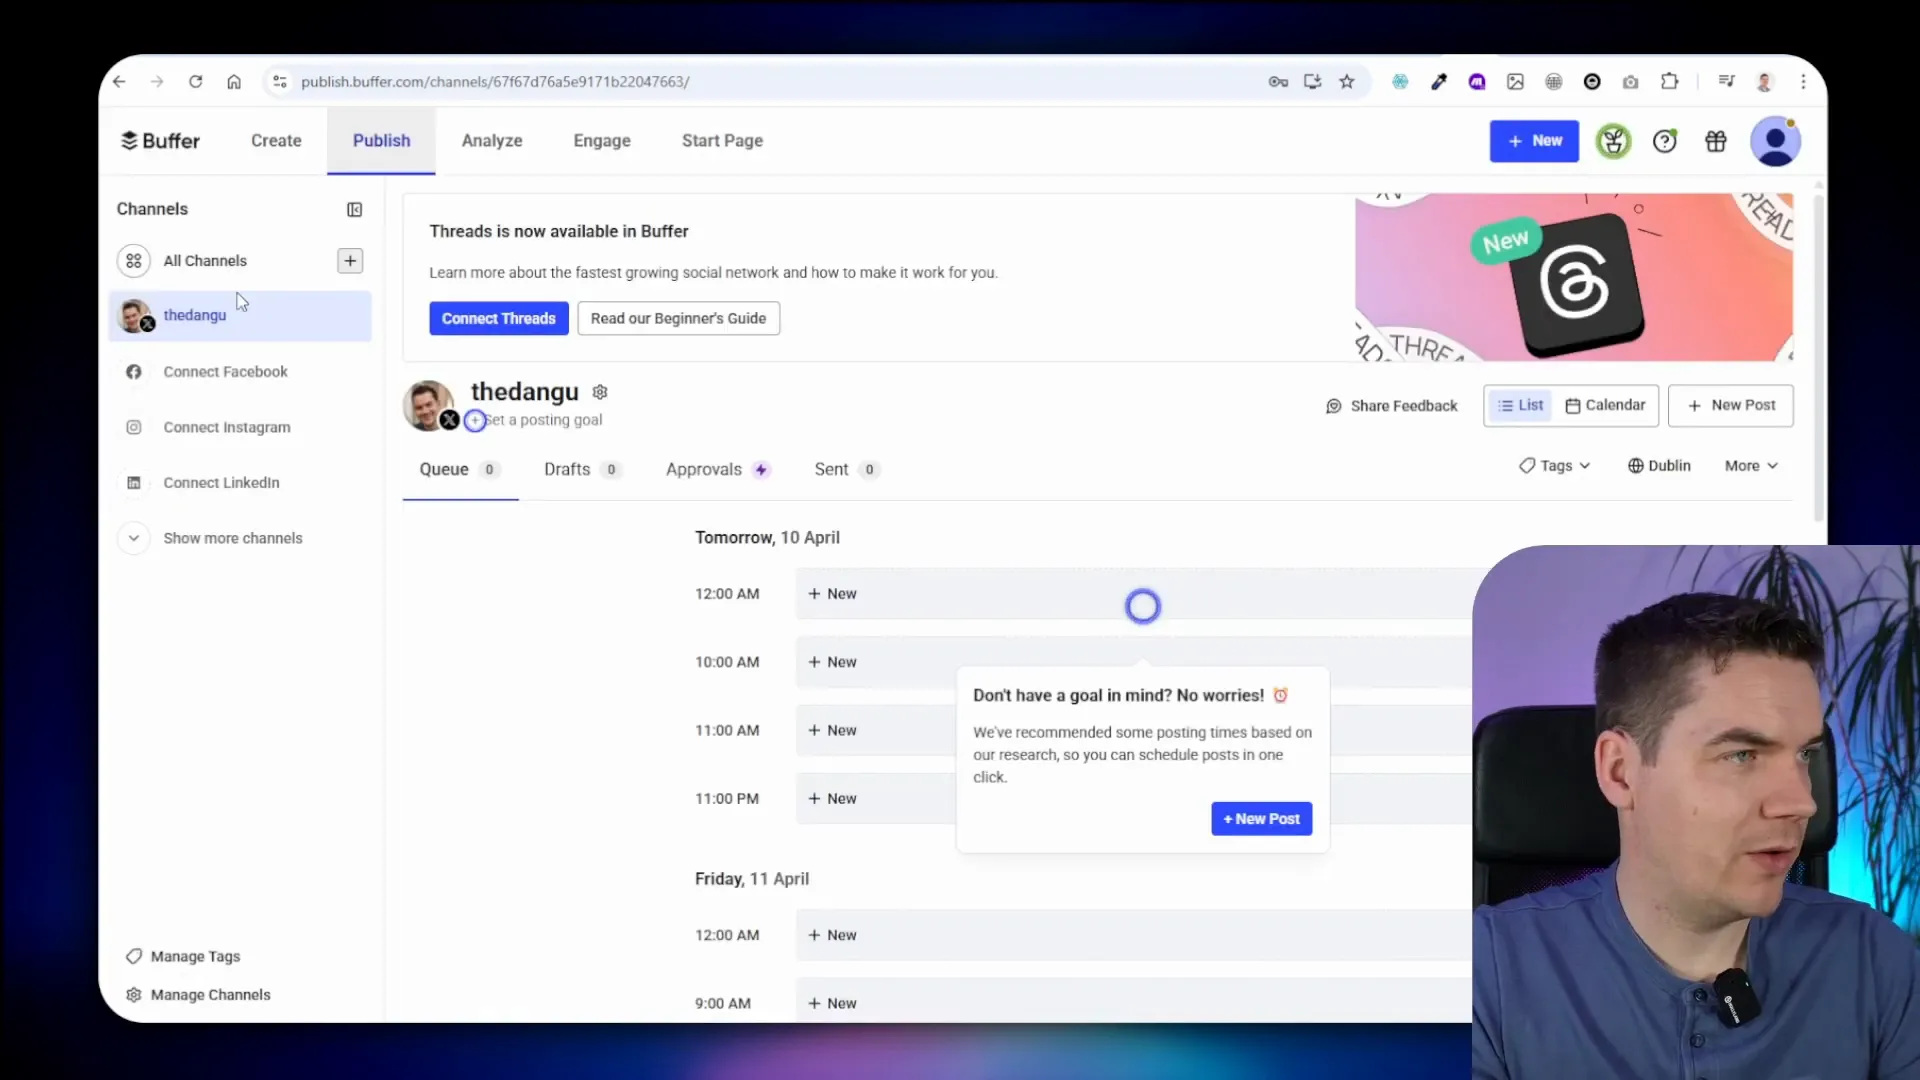
Setting Up Buffer
To integrate Buffer with your existing Make scenarios, follow these steps:
- Add a new Buffer module to your scenario.
- Authorize Buffer through an OAuth pop-up that appears.
- Map the variables from your existing X module to the Buffer module.
- Test the setup to ensure everything is functioning correctly.
This integration allows you to create status updates easily, whether they are text posts or media attachments. Media can be included by simply providing a publicly accessible URL, which differs from the traditional X API approach.

Pricing Considerations
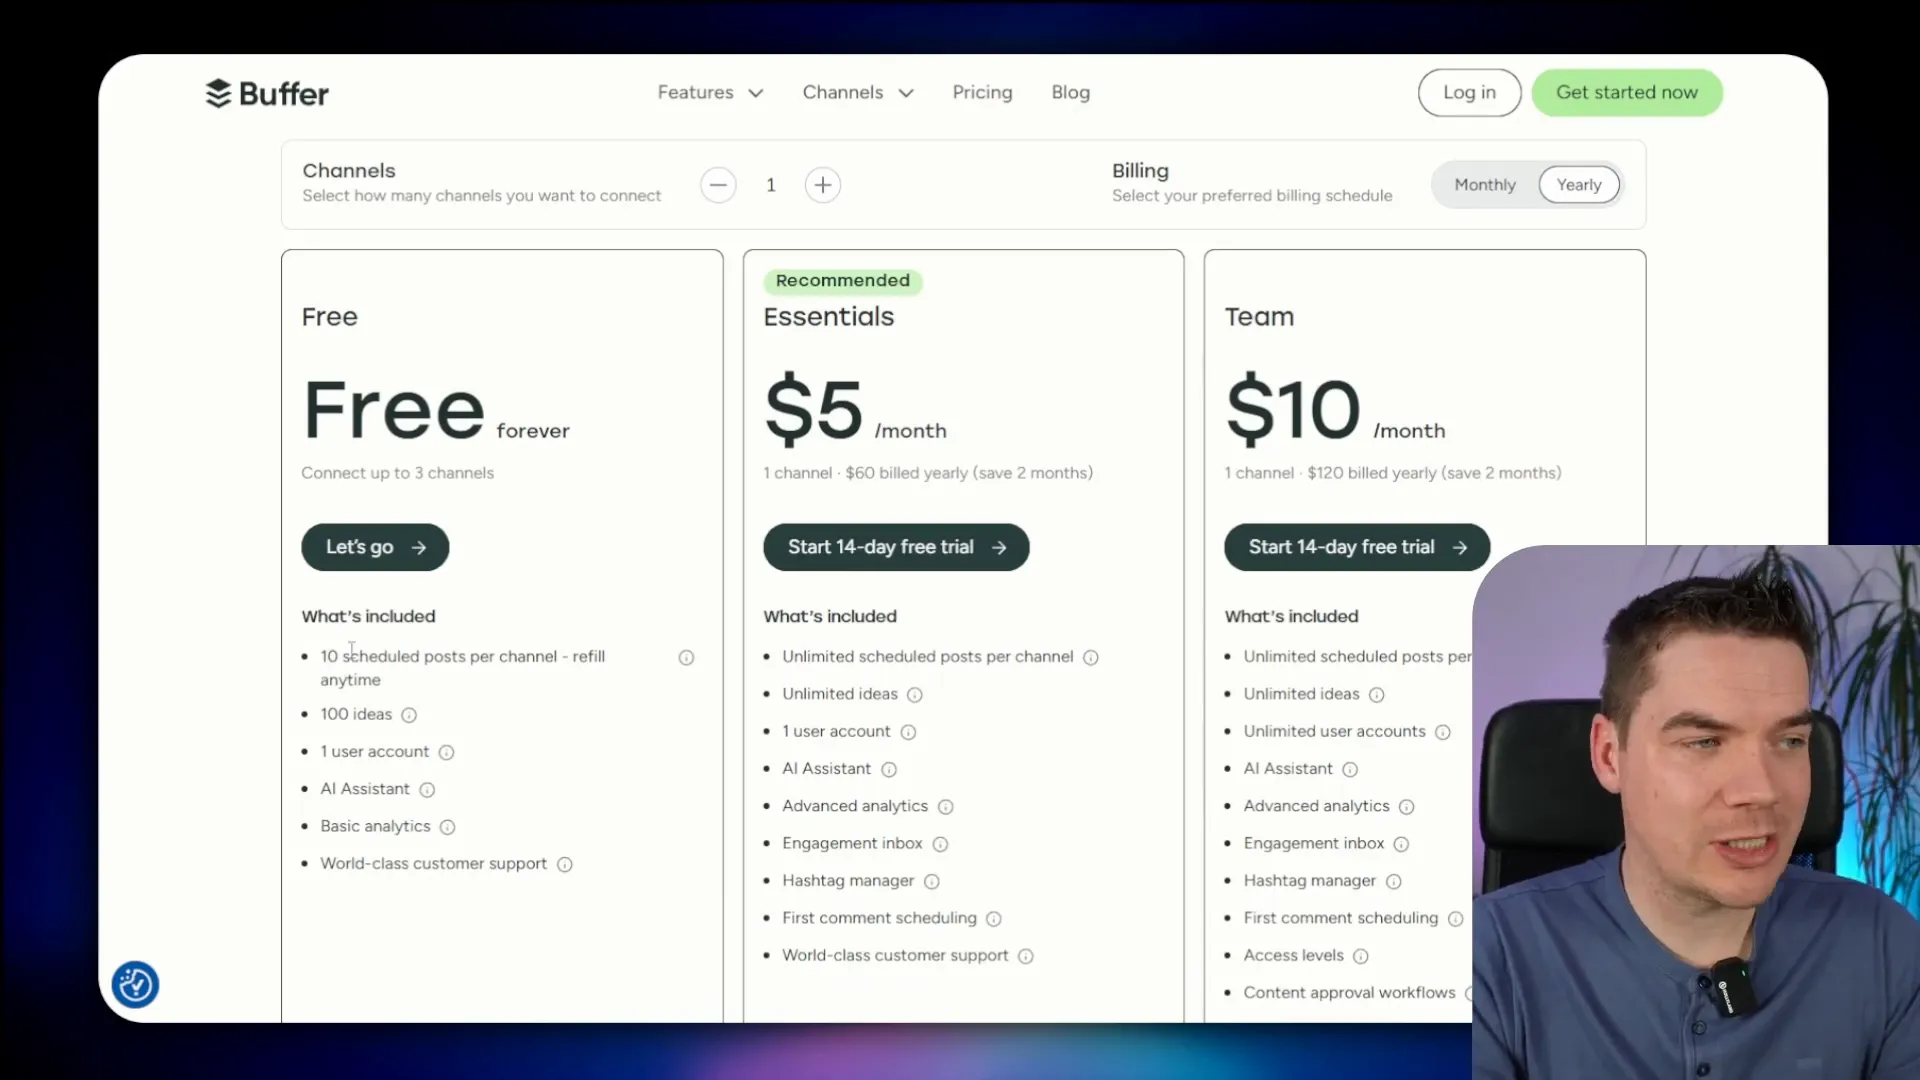
Buffer’s pricing structure is appealing. The free plan allows you to schedule ten posts per month across three channels. This is a significant advantage over Hootsuite, whose entry-level plan starts at $99 per month. Buffer’s flexibility means you can post as many updates as you want, with some restrictions on how many can be scheduled at once.
Daily posting limits for Buffer indicate that you can post up to 100 times every 24 hours, which is beneficial for active users. For anyone looking to manage their social media presence efficiently, Buffer presents a compelling alternative.
Buffer’s Features and Limitations
While Buffer is a strong contender, it doesn’t support every endpoint in the X API. If your needs extend beyond what Buffer offers, you may need to look into a direct integration with the X API. Buffer excels in providing an easy-to-use interface for posting tweets, images, and videos, making it ideal for basic use cases.
However, for more advanced functionalities, such as retrieving specific data from the API, direct integration is necessary. That’s where the native HTTP modules in Make come into play, allowing users to hit specific endpoints directly.
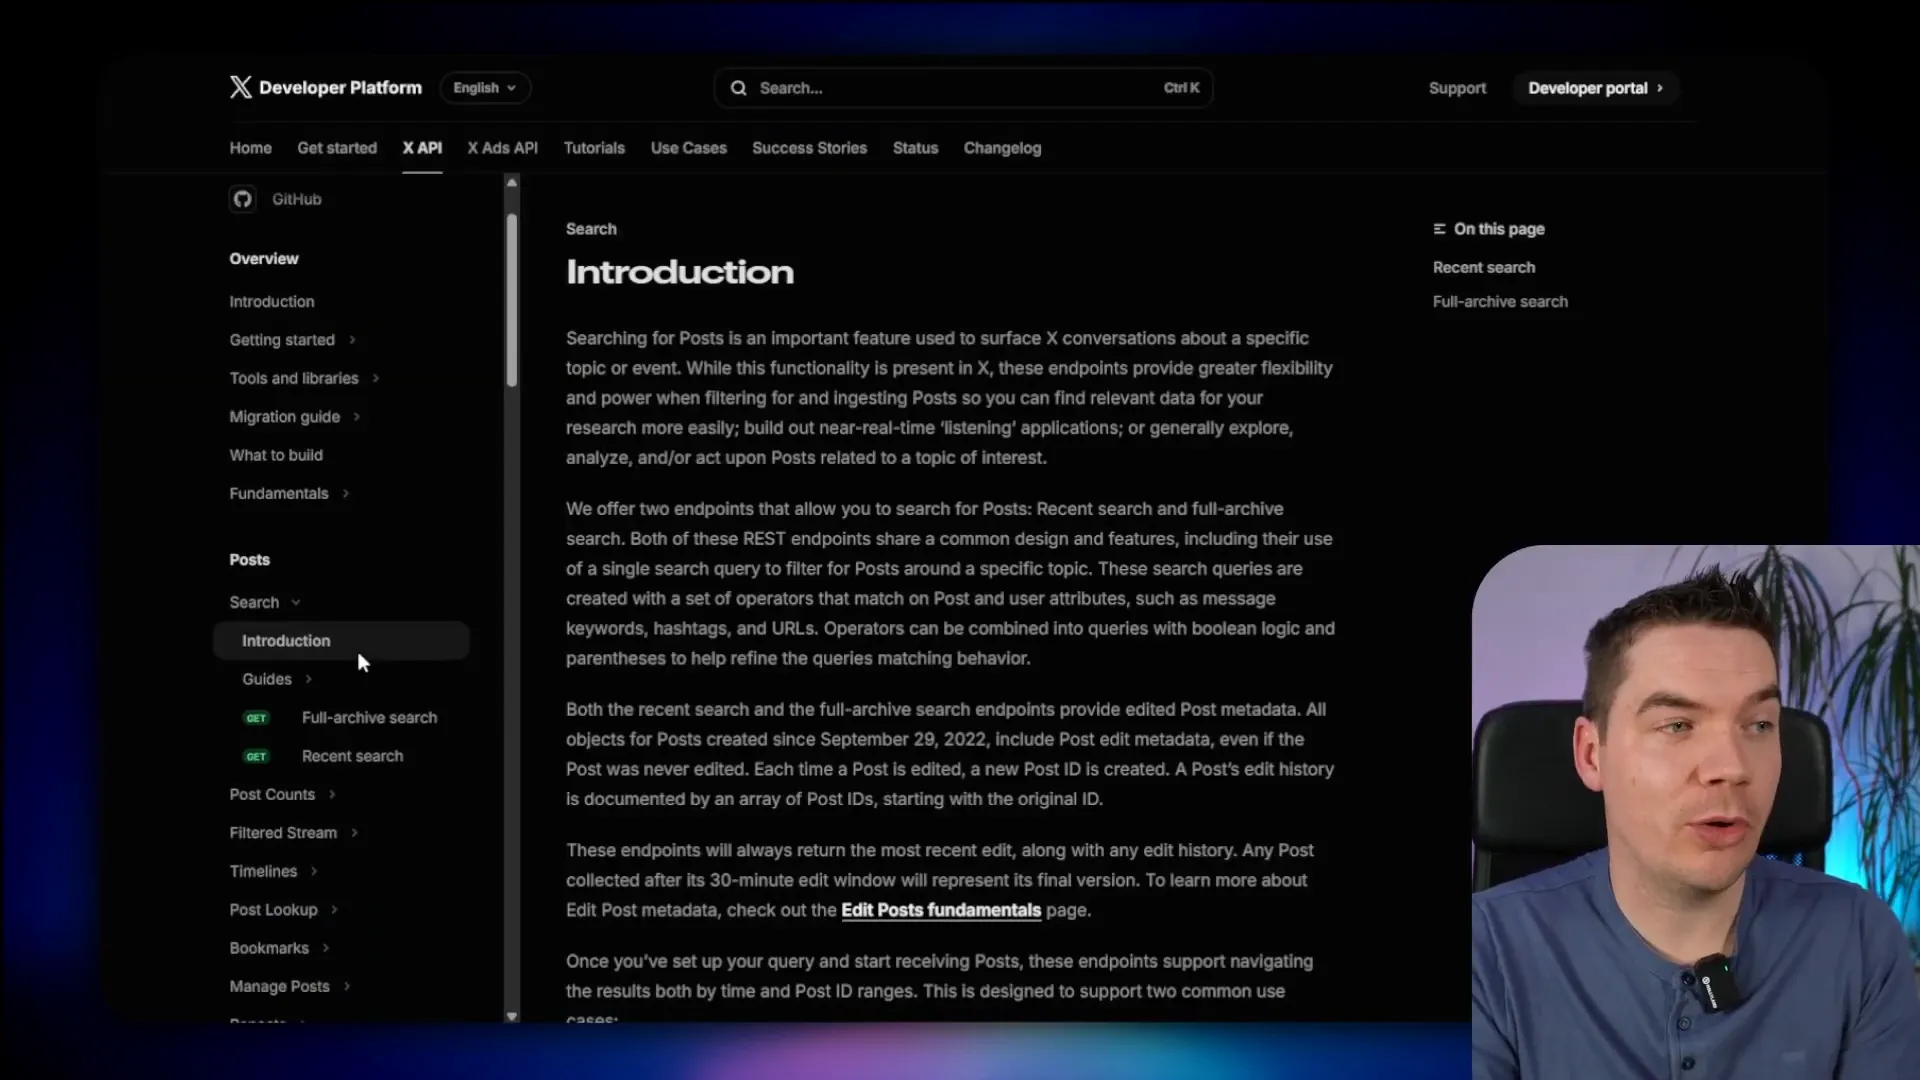
Option 2: Direct X API Integration
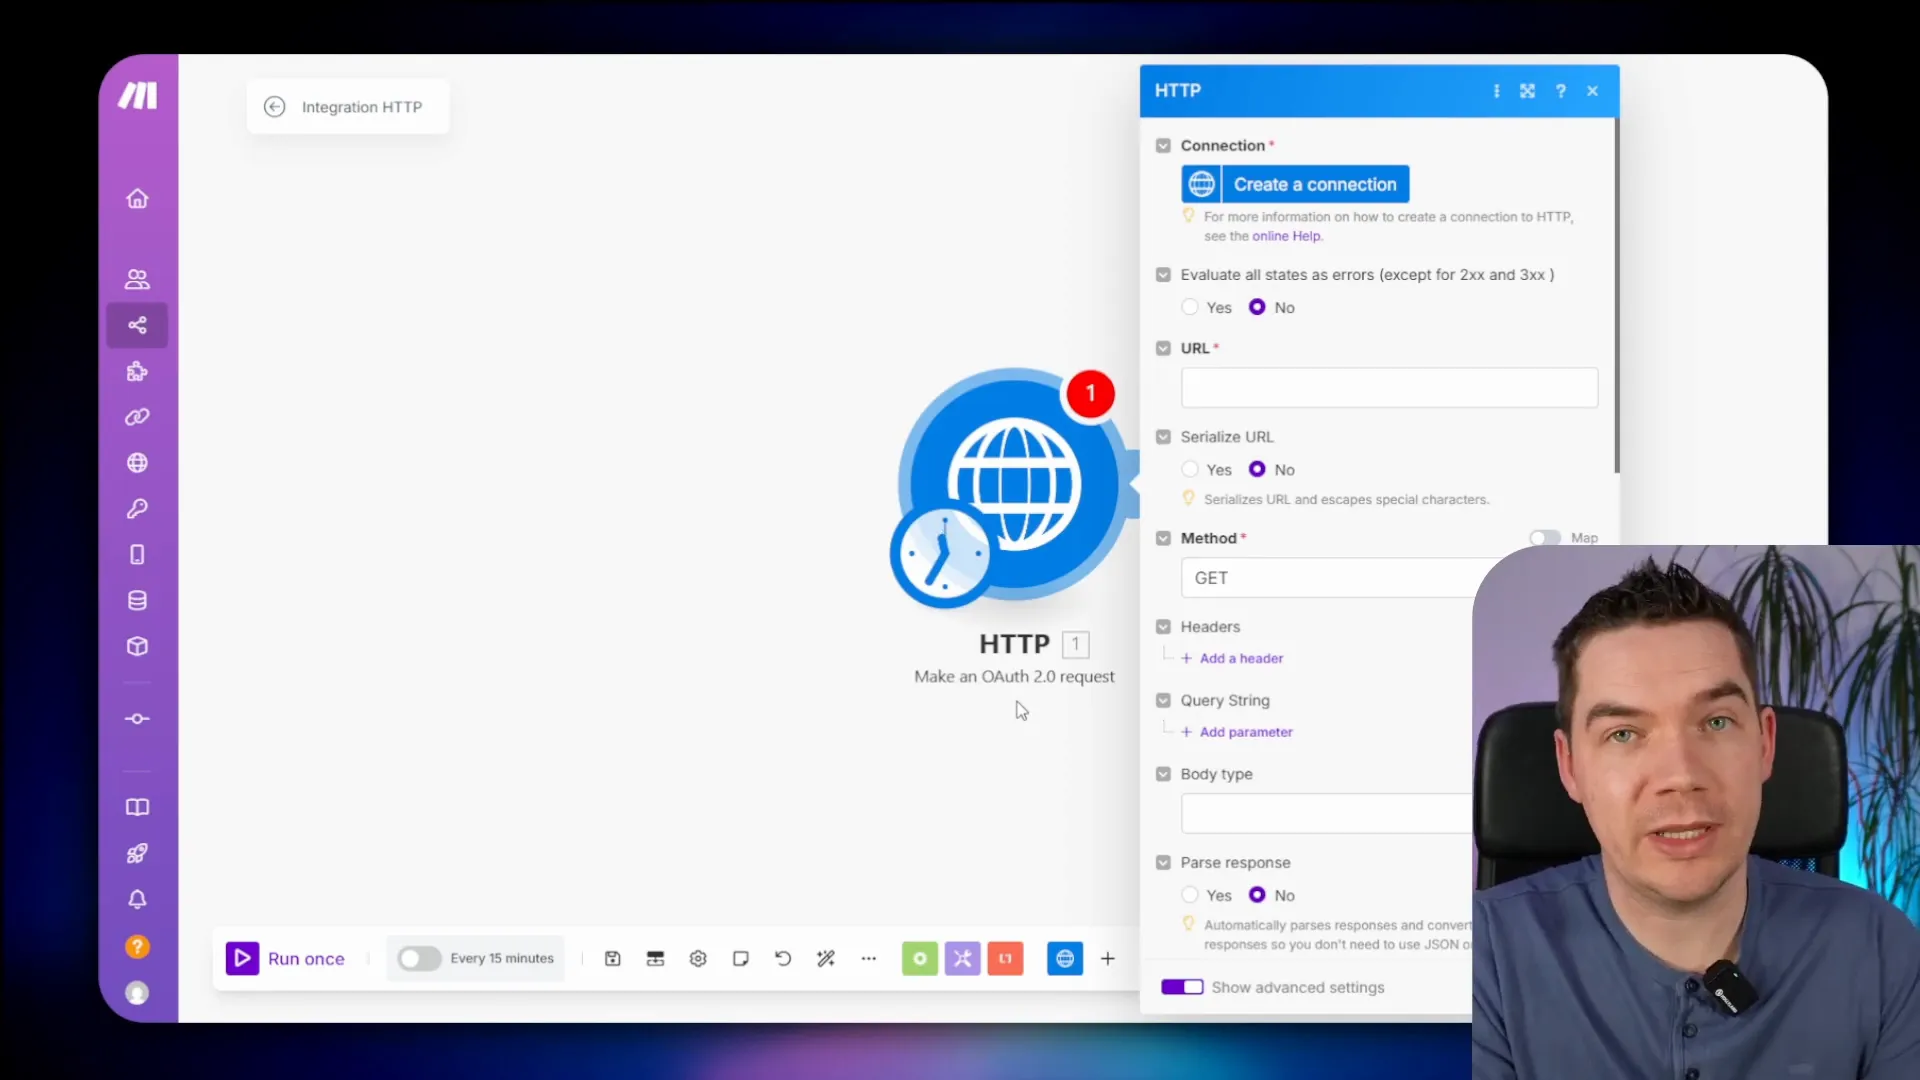
If Buffer’s capabilities don’t meet your needs, you can use Make’s native HTTP modules to connect directly to the X API. This method allows for more customization and access to specific API endpoints. However, it does require a deeper understanding of how OAuth works, particularly the PKCE variation.
Setting up this integration involves generating an authentication URL, creating a scenario to generate an access token, and then using that token to make API calls. It’s a more complex solution but provides comprehensive access to the X API.
Understanding OAuth2 and PKCE
OAuth2 is a framework that allows third-party applications to obtain limited access to user accounts on an HTTP service. It operates by allowing users to authorize applications to act on their behalf without sharing their credentials. This is essential for secure integrations, especially when dealing with sensitive data.
PKCE, or Proof Key for Code Exchange, enhances OAuth2 security by adding an additional layer of verification. Originally designed for mobile and public clients, it mitigates the risk of authorization code interception. By using PKCE, I can ensure that even if someone intercepts the authorization code, they won’t be able to use it without the original request’s secret.
In my integration with the X API, understanding both OAuth2 and PKCE is crucial. Most endpoints require these protocols, and implementing them correctly ensures that my application communicates securely with the API.

Building the Authentication URL
To begin the integration, I first need to build an authentication URL. This URL is essential for directing users to authorize my application with X. The process involves gathering several key parameters:
- Client ID: This is associated with my app in the X developer portal.
- Redirect URI: The URL where users will be redirected after authorization.
- Scope: Defines the level of access my application is requesting. For example, I might request access to read and write tweets.
- State: A unique identifier to prevent CSRF attacks.
- PKCE Parameters: This includes the code challenge and method.
Once I have these parameters, I can assemble the authentication URL. It will look something like this:
https://api.x.com/oauth/authorize?response_type=code&client_id={CLIENT_ID}&redirect_uri={REDIRECT_URI}&scope={SCOPE}&state={STATE}&code_challenge={CODE_CHALLENGE}&code_challenge_method=S256This URL directs users to the X authorization page, where they can log in and approve the requested permissions.

Token Generation and Storage
After the user authorizes the application, X redirects them back to my specified redirect URI along with an authorization code. The next step is to exchange this code for an access token. This involves making a POST request to the token endpoint with the following parameters:
- Grant Type: Set to “authorization_code”.
- Code: The authorization code received from the previous step.
- Redirect URI: Must match the URI used in the initial authorization request.
- Client ID and Client Secret: Required for authentication.
- Code Verifier: This is a key part of PKCE that ensures the request is legitimate.
Once the request is successful, I receive an access token and a refresh token. It’s crucial to store these tokens securely. I use a data store in my application to keep them safe, ensuring that sensitive information like the client secret is treated as confidential.

Option 3: N8N and Make Hybrid Workflow
N8N offers a powerful alternative for handling X API integrations, especially for those who want a more user-friendly experience. By using N8N, I can set up workflows that can be triggered by webhooks from Make. This hybrid approach allows me to leverage the strengths of both platforms.
To create a workflow in N8N, I start by adding a webhook trigger. This webhook will listen for incoming requests from my Make scenarios. Once triggered, I can add a Twitter module to create a tweet or perform other actions within X.
Setting up the connection is straightforward. I enter my client ID and client secret, allowing N8N to communicate with the X API seamlessly. This integration supports PKCE out of the box, simplifying the authentication process.
Once the workflow is configured, I can send data from Make to N8N. The HTTP module in Make allows me to make requests to the N8N webhook, passing along any necessary information. This way, I can maintain full control over my X API interactions without the complexities of manual token management.

